
Custom Form Inputs

You can define custom Angular or React components which can be used to render Custom Fields you have defined on your entities as well as configurable args used by custom Configurable Operations.

For Custom Fields

Let's say you define a custom "intensity" field on the Product entity:

src/vendure-config.ts
import { VendureConfig } from '@vendure/core';

export const config: VendureConfig = {
// ...
customFields: {
Product: [
{ name: 'intensity', type: 'int', min: 0, max: 100, defaultValue: 0 },
],
},
}

By default, the "intensity" field will be displayed as a number input:

./ui-extensions-custom-field-default.webp

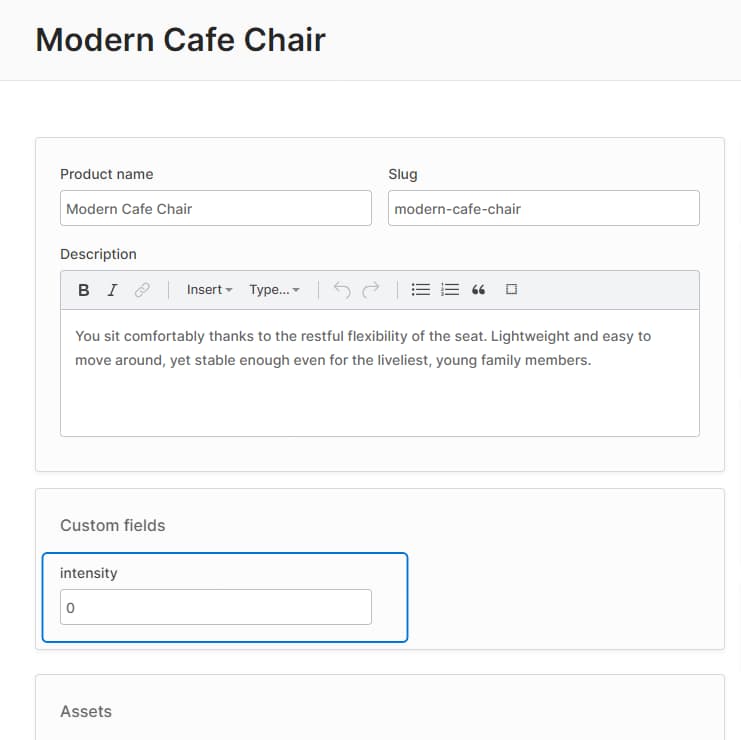
But let's say we want to display a range slider instead.

1. Define a component

First we need to define a new Angular or React component to render the slider:

Angular components will have the readonly, config and formControl properties populated automatically.

src/plugins/common/ui/components/slider-form-input/slider-form-input.component.ts
import { Component } from '@angular/core';
import { FormControl } from '@angular/forms';
import { IntCustomFieldConfig, SharedModule, FormInputComponent } from '@vendure/admin-ui/core';

@Component({
template: `
<input
type="range"
[min]="config.min || 0"
[max]="config.max || 100"
[formControl]="formControl" />
{{ formControl.value }}
`,
standalone: true,
imports: [SharedModule],
})
export class SliderControlComponent implements FormInputComponent<IntCustomFieldConfig> {
readonly: boolean;
config: IntCustomFieldConfig;
formControl: FormControl;
}

2. Register the component

Next we will register this component in our providers.ts file and give it a unique ID, 'slider-form-input':

src/plugins/common/ui/providers.ts
import { registerFormInputComponent } from '@vendure/admin-ui/core';
import { SliderControlComponent } from './components/slider-form-input/slider-form-input.component';

export default [
registerFormInputComponent('slider-form-input', SliderControlComponent),
];

3. Register the providers

The providers.ts is then passed to the compileUiExtensions() function as described in the UI Extensions Getting Started guide:

src/vendure-config.ts
import * as path from 'path';
import { VendureConfig } from '@vendure/core';
import { AdminUiPlugin } from '@vendure/admin-ui-plugin';
import { compileUiExtensions } from '@vendure/ui-devkit/compiler';

export const config: VendureConfig = {
// ...
plugins: [
AdminUiPlugin.init({
port: 3302,
app: compileUiExtensions({
outputPath: path.join(__dirname, '../admin-ui'),
extensions: [{
id: 'common',
extensionPath: path.join(__dirname, 'plugins/common/ui'),
providers: ['providers.ts'],
}],
}),
}),
],
};

4. Update the custom field config

Once registered, this new slider input can be used in our custom field config:

src/vendure-config.ts
customFields: {
Product: [
{
name: 'intensity', type: 'int', min: 0, max: 100, defaultValue: 0,
ui: {component: 'slider-form-input'}
},
],
}

As we can see, adding the ui property to the custom field config allows us to specify our custom slider component. The component id 'slider-form-input' must match the string passed as the first argument to registerFormInputComponent().

info

If we want, we can also pass any other arbitrary data in the ui object, which will then be available in our component as this.config.ui.myField. Note that only JSON-compatible data types are permitted, so no functions or class instances.

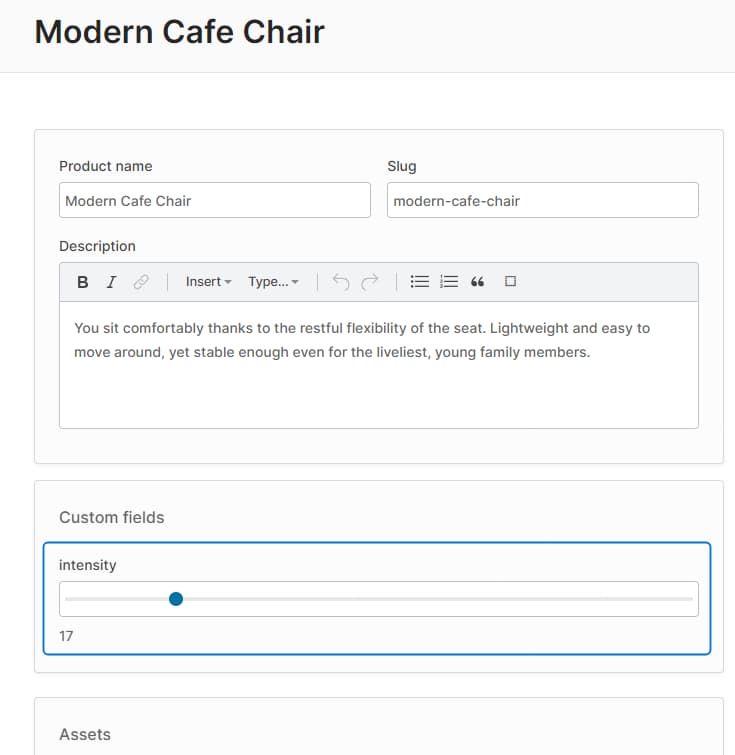
Re-compiling the Admin UI will result in our SliderControl now being used for the "intensity" custom field:

./ui-extensions-custom-field-slider.webp

Custom Field Controls for Relations

If you have a custom field of the relation type (which allows you to relate entities with one another), you can also define custom field controls for them. The basic mechanism is exactly the same as with primitive custom field types (i.e. string, int etc.), but there are a couple of important points to know:

  1. The value of the formControl will be the related entity object rather than an id. The Admin UI will internally take care of converting the entity object into an ID when performing the create/update mutation.
  2. Your control will most likely need to fetch data in order to display a list of selections for the user.

Here's an example of a custom field control for a relation field which relates a Product to a custom ProductReview entity:

src/plugins/reviews/ui/components/relation-review-input/relation-review-input.component.ts
import { Component, OnInit } from '@angular/core';
import { FormControl } from '@angular/forms';
import { ActivatedRoute } from '@angular/router';
import { RelationCustomFieldConfig } from '@vendure/common/lib/generated-types';
import { FormInputComponent, DataService, SharedModule } from '@vendure/admin-ui/core';
import { Observable } from 'rxjs';
import { switchMap } from 'rxjs/operators';

import { GET_REVIEWS_FOR_PRODUCT } from '../product-reviews-list/product-reviews-list.graphql';

@Component({
selector: 'relation-review-input',
template: `
<div *ngIf="formControl.value as review">
<vdr-chip>{{ review.rating }} / 5</vdr-chip>
{{ review.summary }}
<a [routerLink]="['/extensions', 'product-reviews', review.id]">
<clr-icon shape="link"></clr-icon>
</a>
</div>
<select [formControl]="formControl" [compareWith]="compareFn">
<option [ngValue]="null">Select a review...</option>
<option *ngFor="let item of reviews$ | async" [ngValue]="item">
<b>{{ item.summary }}</b>
{{ item.rating }} / 5
</option>
</select>
`,
standalone: true,
imports: [SharedModule],
})
export class RelationReviewInputComponent implements OnInit, FormInputComponent<RelationCustomFieldConfig> {
readonly: boolean;
formControl: FormControl;
config: RelationCustomFieldConfig;

reviews$: Observable<any[]>;

constructor(private dataService: DataService, private route: ActivatedRoute) {}

ngOnInit() {
this.reviews$ = this.route.data.pipe(
switchMap(data => data.entity),
switchMap((product: any) => {
return this.dataService
.query(GET_REVIEWS_FOR_PRODUCT, { productId: product.id })
.mapSingle(({ product }) => product?.reviews.items ?? []);
}),
);
}

compareFn(item1: { id: string } | null, item2: { id: string } | null) {
return item1 && item2 ? item1.id === item2.id : item1 === item2;
}
}

For ConfigArgs

ConfigArgs are used by classes which extend Configurable Operations (such as ShippingCalculator or PaymentMethodHandler). These ConfigArgs allow user-input values to be passed to the operation's business logic.

They are configured in a very similar way to custom fields, and likewise can use custom form inputs by specifying the ui property.

Here's an example:

src/config/order-fixed-discount-action.ts
export const orderFixedDiscount = new PromotionOrderAction({
code: 'order_fixed_discount',
args: {
discount: {
type: 'int',
ui: {
component: 'currency-form-input',
},
},
},
execute(ctx, order, args) {
return -args.discount;
},
description: [{languageCode: LanguageCode.en, value: 'Discount order by fixed amount'}],
});