The Vendure CLI is a command-line tool for boosting your productivity as a developer by automating common tasks such as creating new plugins, entities, API extensions and more.
It is much more than just a scaffolding tool - it is able to analyze your project and intelligently modify your existing codebase to integrate new functionality.
The Vendure CLI comes installed with a new Vendure project by default from v2.2.0+
To manually install the CLI, run:
The Vendure CLI supports both interactive and non-interactive modes:
For guidance on using the CLI together with project instructions for AI coding agents, see the AI-assisted development guide.
The dev command runs the server, worker and Dashboard in development mode. Use a target to run one process:
server in vendure dev server selects the server process. selects the project directory.
Relative project paths are resolved against the working directory. Entry files and the Vite config are resolved
from the selected project.
--project <dir>The command resolves the project in this order:
--project <dir> if supplied. The directory must have a package.json with @vendure/core in
dependencies or devDependencies. An invalid path stops the command.package.json depends on @vendure/core.package.json workspaces field. Both
["server"] and { "packages": ["server"] } are supported, with * wildcards such as apps/*.packages, apps, libs, services and modules in that order.If more than one declared workspace member depends on @vendure/core, the command lists the candidates and
asks you to select one with --project. If no project is found, the error names the searched directory and
--project.
For a workspace with "workspaces": ["server"], run vendure dev or vendure dev server from the root.
Running from inside server/ also works.
The CLI reads --project before it loads plugins and parses the full dev command. It reads the plugin
allowlist from the selected project's package.json and resolves plugin packages from that project.
A plugin must still be a direct project dependency and declare vendure.cliPlugin.
Workspace project discovery also selects the plugin allowlist for other CLI commands. Their own project
validation and actions keep their existing behavior. From a project subdirectory, plugin lookup walks up
to the project directory.
| Option | Description |
|---|---|
--project <dir> | Select the Vendure project directory before discovery. |
--server-entry <path> | Server entry file. Default: ./src/index.ts. |
--worker-entry <path> | Worker entry file. Default: ./src/index-worker.ts. |
--vite-config <path> | Dashboard Vite config file. Default: Vite config discovery. |
--inspect [host:port] | Enable the Node.js inspector for the server and worker. |
--inspect-brk [host:port] | Enable the inspector and pause before user code starts. |
--no-reload | Disable automatic server and worker restarts. |
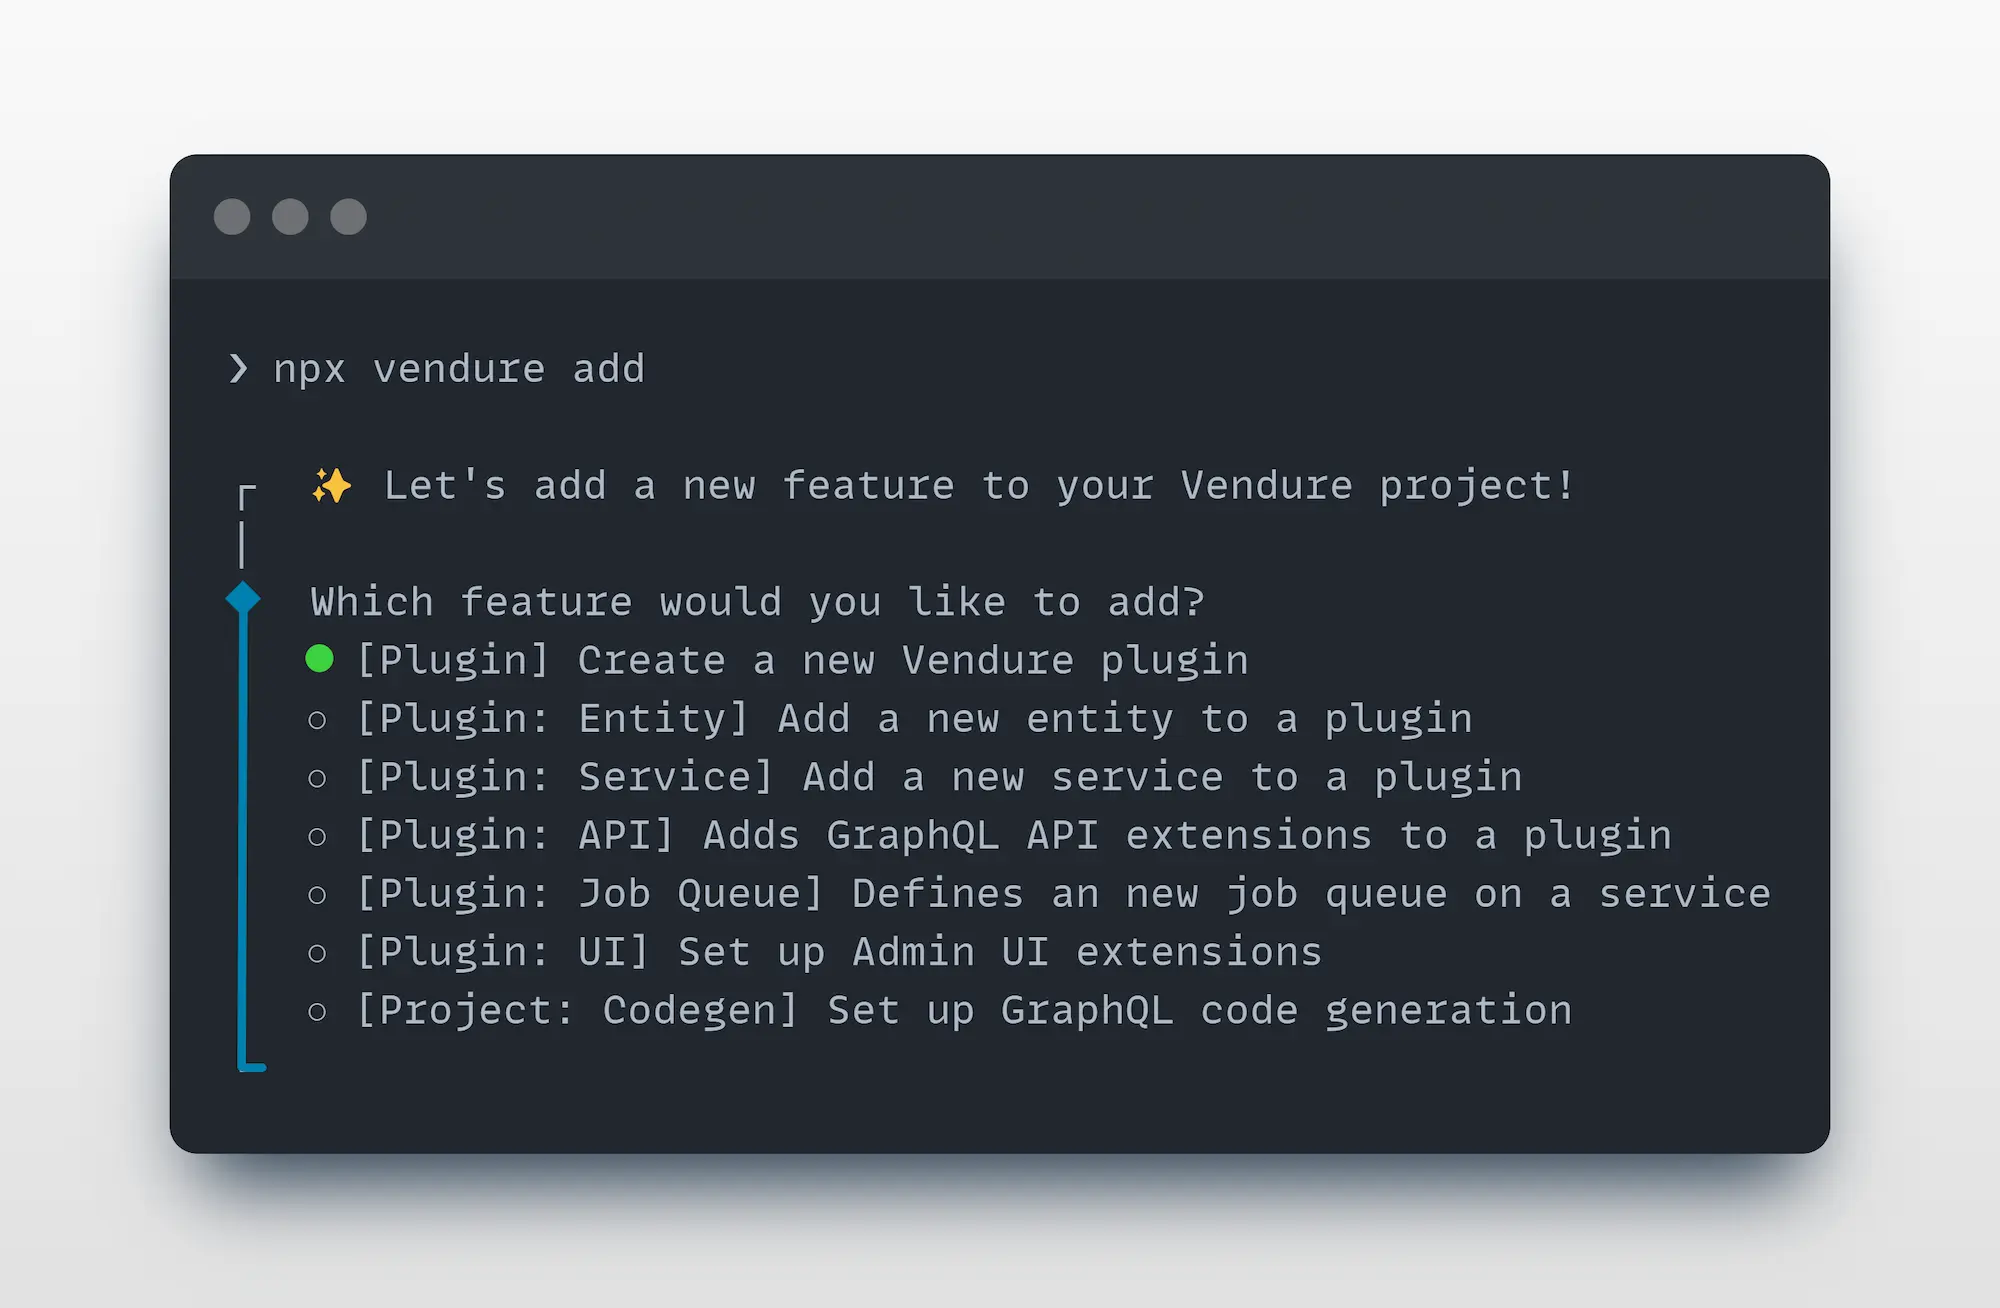
The add command is used to add new entities, resolvers, services, plugins, and more to your Vendure project.
From your project's root directory, run:
The CLI will guide you through the process of adding new functionality to your project.
The add command is much more than a simple file generator. It is able to
analyze your project source code to deeply understand and correctly update your project files.
The first entry, "Vendure Platform features (B2B, advanced search, ...), free trial", links the project to Vendure Console with vendure console link, opens the free trial page of the Console Project in your browser, and then runs npx @vendure-platform/create@latest add to install the Vendure Platform packages. You can cancel at each step. The CLI makes no network call before you select this entry. npx vendure add --platform starts the same flow, and needs an interactive terminal.
For automation or when you know exactly what you need to add, you can use the non-interactive mode with specific arguments and options:
| Flag | Long Form | Description | Example |
|---|---|---|---|
--platform | Start the Platform trial flow | vendure add --platform | |
-p | --plugin <n> | Create a new plugin | vendure add -p MyPlugin |
-e | --entity <n> | Add a new entity to a plugin | vendure add -e MyEntity --selected-plugin MyPlugin |
-s | --service <n> | Add a new service to a plugin | vendure add -s MyService --selected-plugin MyPlugin |
-j | --job-queue [plugin] | Add job queue support | vendure add -j MyPlugin --name job-name --selected-service ServiceName |
-c | --codegen [plugin] | Add GraphQL codegen configuration | vendure add -c MyPlugin |
-a |
Entity (-e) additional options:
--selected-plugin <n>: Name of the plugin to add the entity to (required)--custom-fields: Add custom fields support to the entity--translatable: Make the entity translatableService (-s) additional options:
--selected-plugin <n>: Name of the plugin to add the service to (required)--type <type>: Type of service: basic or entity (default: basic)Job Queue (-j) additional options:
--name <name>: Name for the job queue (required)--selected-service <name>: Service to add the job queue to (required)API Extension (-a) additional options: (requires either)
--queryName <n>: Name for the GraphQL query--mutationName <n>: Name for the GraphQL mutationValidation: Entity and service commands validate that the specified plugin exists in your project. If the plugin is not found, the command will list all available plugins in the error message. Both commands require the --selected-plugin parameter when running in non-interactive mode.
The migrate command is used to generate and manage database migrations for your Vendure project.
From your project's root directory, run:
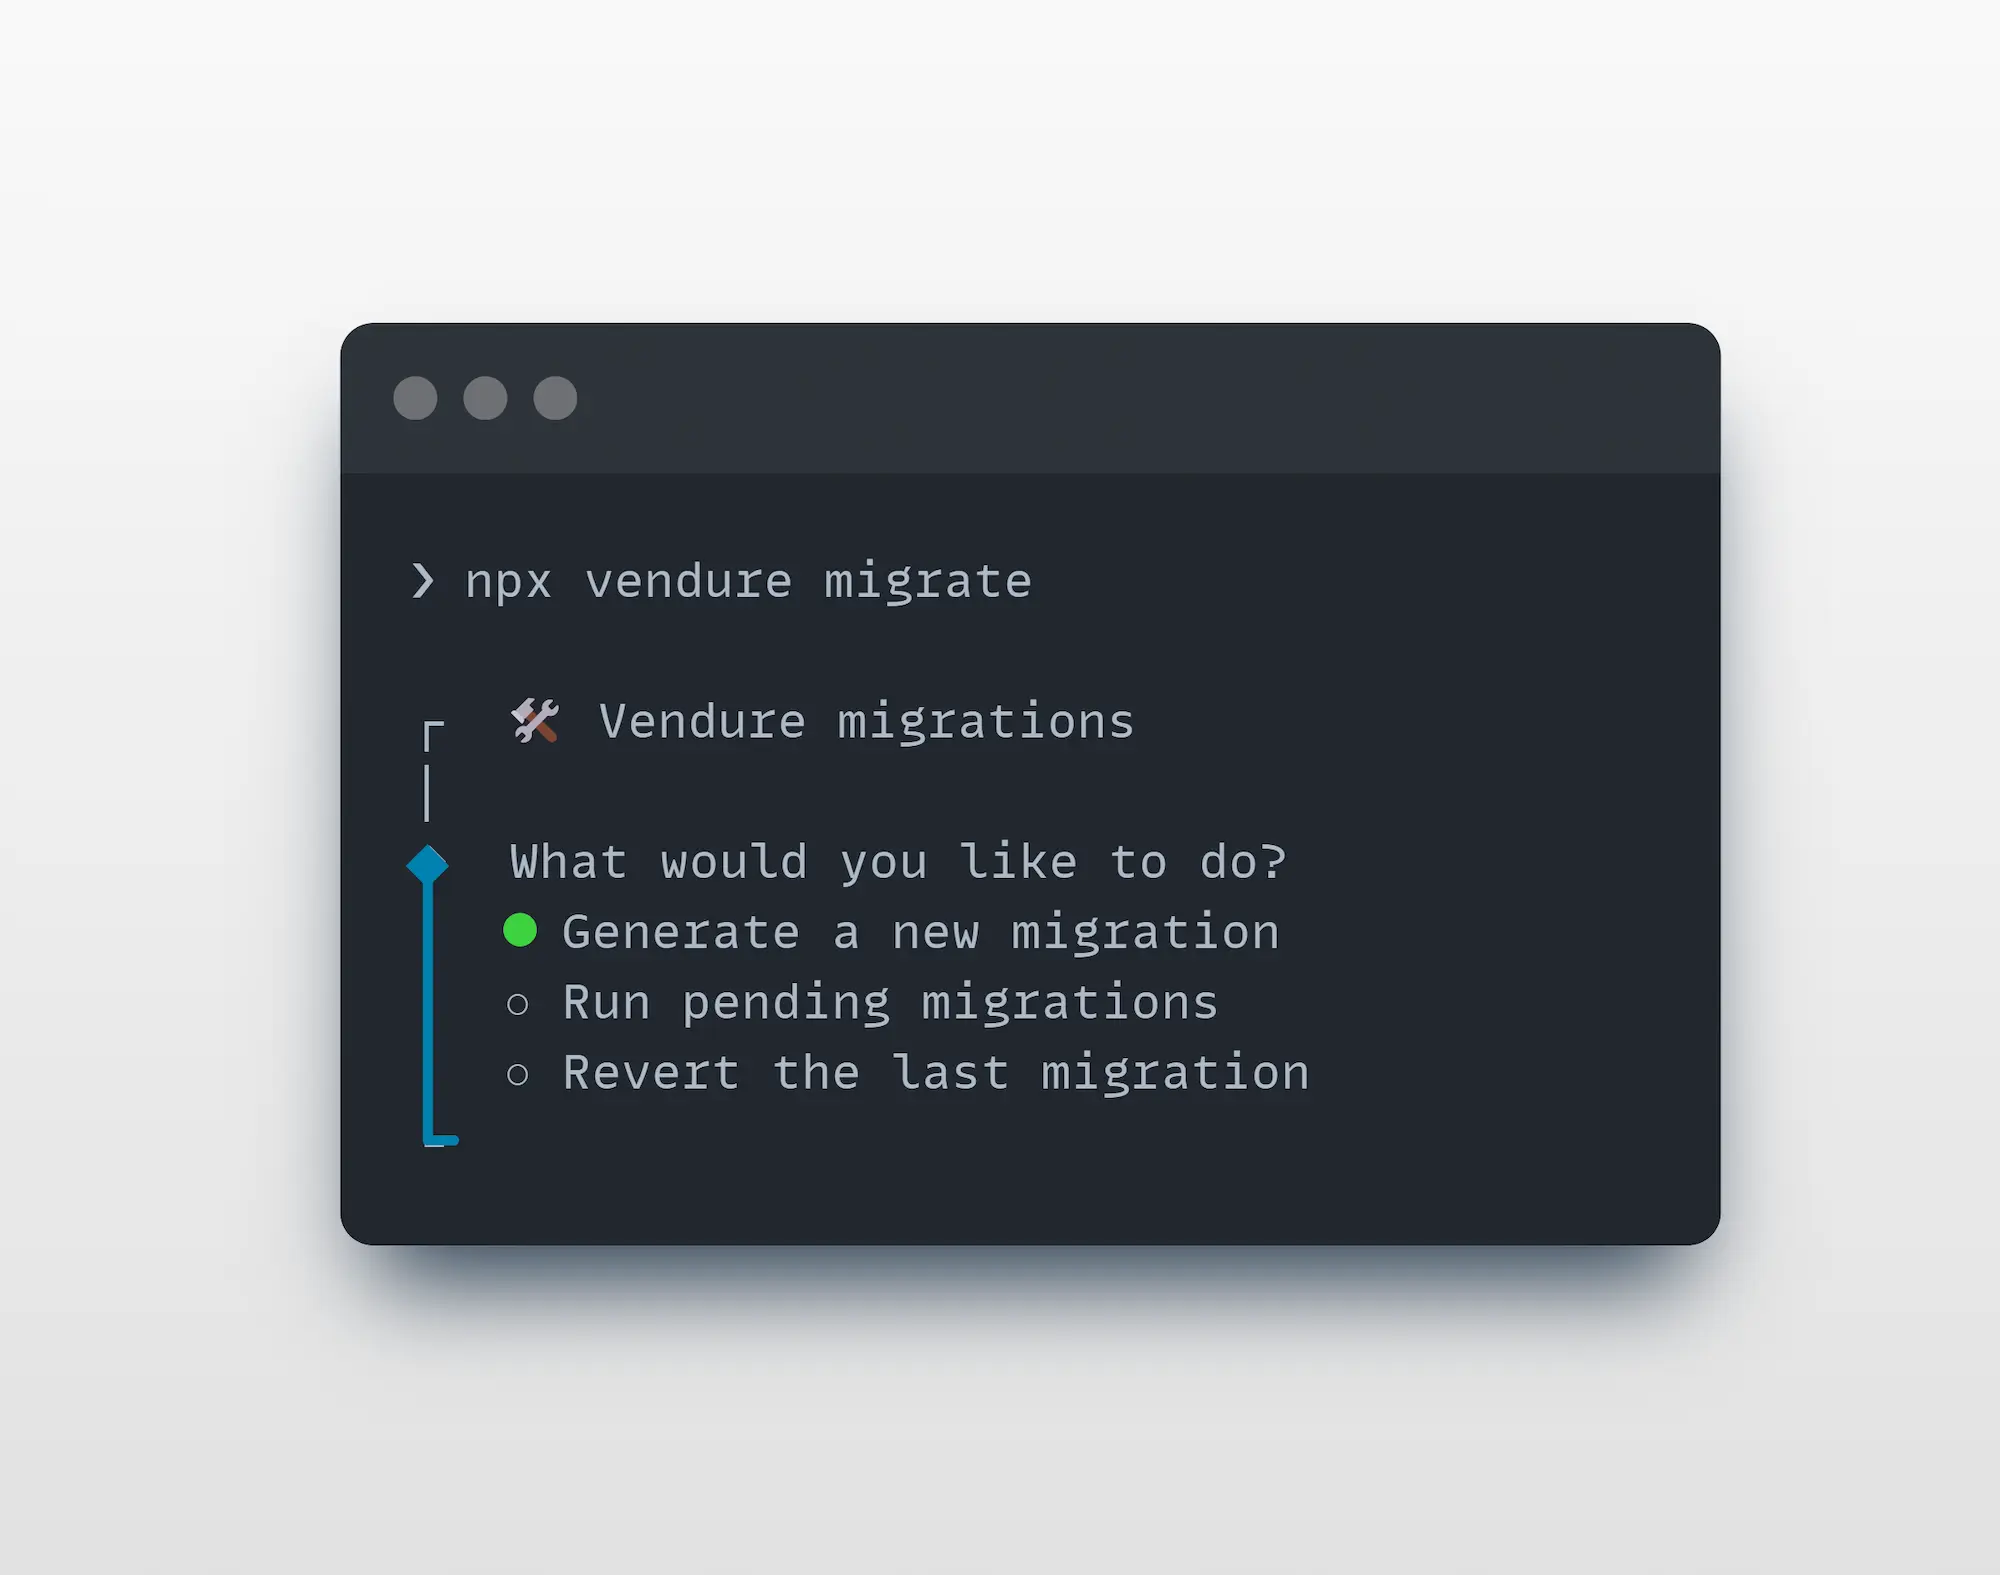
For migration operations, use specific arguments and options:
| Flag | Long Form | Description | Example |
|---|---|---|---|
-g | --generate <name> | Generate a new migration | vendure migrate -g add-user-table |
-r | --run | Run all pending migrations | vendure migrate -r |
--revert | Revert the last migration | vendure migrate --revert | |
-o | --output-dir <path> | Custom output directory for migrations | vendure migrate -g my-migration -o ./migrations |
--from-empty | Generate a complete baseline migration by diffing against an empty shadow database | vendure migrate -g initial --from-empty |
The schema command was added in Vendure v3.5
The schema command allows you to generate a schema file for your Admin or Shop APIs, in either the GraphQL schema definition language (SDL)
or as JSON.
This is useful when integrating with GraphQL tooling such as your IDE's GraphQL plugin.
From your project's root directory, run:
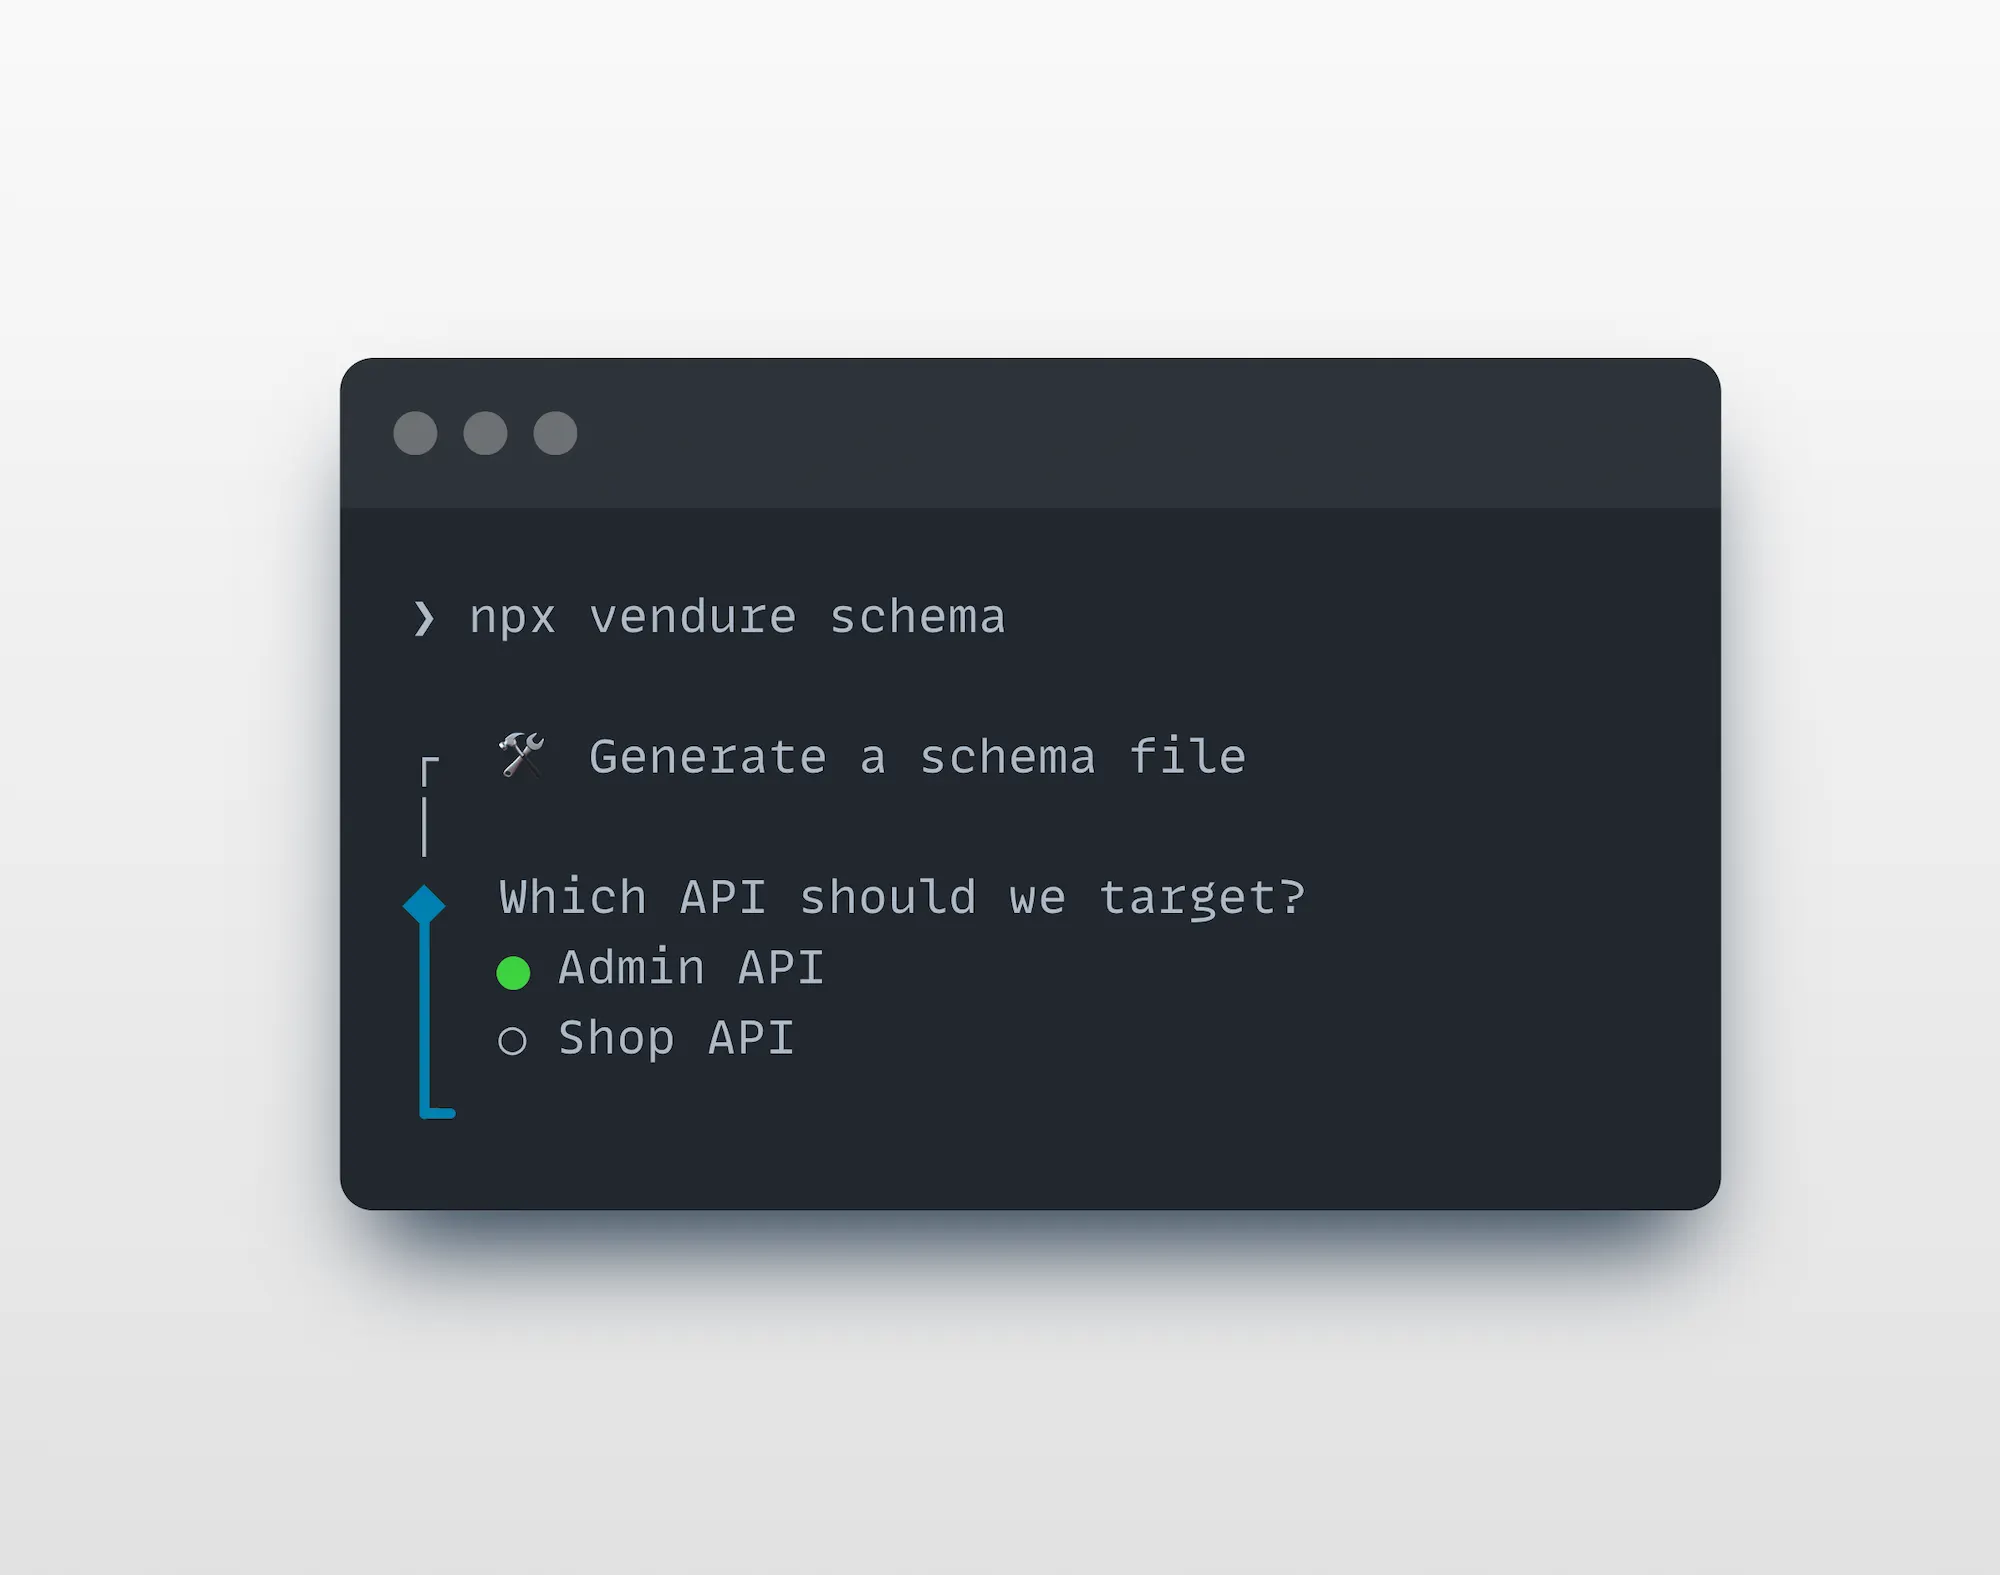
To automate or quickly generate a schema in one command
| Flag | Long Form | Description | Example |
|---|---|---|---|
-a | --api <admin,shop> | Select the API (required) | vendure schema --api admin |
-d | --dir <dir> | Select the output dir (defaults to current dir) | vendure schema --api admin --dir ../.. |
-n | --file-name <name> | The name of the generated file | vendure schema --api admin --file-name introspection.graphql |
-f | --format <sdl,json> | The output format (defaults to SDL) | vendure schema --api admin --format json |
The doctor command was added in Vendure v3.7
The doctor command runs a series of diagnostic checks against your Vendure project and produces an
actionable report. It is useful for debugging a misbehaving project, verifying an upgrade, onboarding
a new machine, or as a guard rail in CI.
Unlike the other commands, doctor is non-interactive only - it runs all applicable checks and prints a report:
By default, the following checks run in order:
| Check | What it verifies |
|---|---|
| Project | Vendure project structure, config file discovery, package manager detection, lockfile consistency, and monorepo support. |
| Dependencies | @vendure/* packages are on matching versions, no duplicate singleton dependencies (graphql, typeorm, @nestjs/core, @nestjs/common, @apollo/server), and that a database driver is installed. |
| Config | Your config loads and validates via preBootstrapConfig() (custom fields, entities), and that plugin compatibility ranges are satisfied. |
| Schema | The Admin API and Shop API GraphQL schemas build successfully, so all plugin extensions and custom field types compile. |
| Database | Database connectivity, using safe read-only overrides. Warns if synchronize: true is set. |
The Production check is not run by default - enable it with --profile production (see below).
The checks are dependency-ordered. If the Project check fails, all later checks are skipped. If the Config check fails, the Schema, Database, and Production checks are skipped, since they all depend on a successfully loaded config.
Each check reports one of four statuses: pass, warn, fail, or skip.
Use --check to run only a subset of checks. The flag is variadic, so list the check names after it:
Valid check names are: project, dependencies, config, schema, database.
When preparing for a production deployment, run the production profile to surface unsafe settings:
This adds a Production check that warns about settings such as disableAuth, default superadmin
credentials, a missing cookie secret, enabled introspection/playground/debug, overly broad CORS,
in-memory job queue/cache/session strategies, and missing asset storage.
For CI pipelines, combine --strict with --format json. The --strict flag treats warnings as
failures, and the command exits with a non-zero code when the overall result is a failure - so a
warning will fail your build:
| Long Form | Description | Example |
|---|---|---|
--config <path> | Specify the path to a custom Vendure config file | vendure doctor --config ./src/my-config.ts |
--check <names...> | Run specific checks only (project, dependencies, config, schema, database) | vendure doctor --check config schema |
--profile <name> | Run profile-specific checks (production) | vendure doctor --profile production |
--format <type> | Output format: text (default) or json | vendure doctor --format json |
--strict | Treat warnings as failures (useful for CI) | vendure doctor --strict |
The auth command signs you in to your Vendure account. vendure console link, Vendure Cloud and other CLI features
share this one login. It does not need a Vendure project, so you can run it from any directory:
The CLI shows a one-time code and opens your browser. Confirm the code and sign in. If your account belongs to more than one organization, you choose one in the browser. Nothing on this machine needs a browser: you can open the URL on another device.
To choose the organization on the command line instead, for example in a script or on a remote machine, pass its Account identifier (in Vendure Console under Settings) or its name. Names match ignoring case:
The CLI looks the organization up in Vendure Console after you sign in. It refuses a name that more than one of your
organizations share, and lists their Account identifiers so you can pick one. To change organization later, run
vendure auth login --organization again.
Check who is signed in, or sign out:
status --json prints the user, organization, client and access token expiry. It never includes a token. It exits with
code 1 when nobody is signed in.
The login is stored in auth.json in the CLI configuration directory (~/.config/vendure by default, or
VENDURE_CLI_CONFIG_DIR) and is readable only by your user. The CLI renews the access token automatically.
vendure auth logout asks Vendure Console to end the session, then removes the login from this machine. This ends
the login for vendure console too. Once Console has ended the session, a copy of the login stops working as well. When Console cannot be reached, the command still
removes the login and warns that a copy keeps working until it expires.
The CLI signs in to production Vendure Console by default. It reads the WorkOS client to sign in with from that
Console, so a login is always one the Console accepts. To work against staging, set
VENDURE_CONSOLE_API_URL=https://staging.api.vendure.io. vendure console link reads the same variable but also needs
VENDURE_CONSOLE_APP_URL=https://staging.console.vendure.io, so set both when you use both commands. A login stored
for one Console is not used with another.
The CLI sends your access token only to the official Vendure Console API of the selected environment. During local
development, VENDURE_CONSOLE_API_URL can point at a loopback Console API. Any other value is refused.
The console command links a local Vendure application to a Project in Vendure Console. Run the command from a
Vendure project directory:
The command uses the login from vendure auth login. When this machine has no login for the
selected Console, the command signs you in first, the same way: it shows a one-time code and opens your browser. If
the browser cannot open, the CLI prints the URL so that you can open it on any device.
The CLI reads your Customer Accounts from Vendure Console. With one Customer Account, it uses that account. With
more than one, you choose the account in the terminal, also when the sign-in already scoped the login to one of them.
The account the login is scoped to is the first choice. Without a terminal and with more than one account, the command
keeps the account the login is scoped to, prints its name, and shows how to pass another one with --organization. If
the login has no account yet, the command stops and lists your accounts so that you can pass one. With no Customer
Account, the command stops and prints the Console page where you create one. The CLI stores the login for the chosen
account, so the next command with --organization or a single account does not ask again.
The CLI then lists the active Projects of the organization you are signed in to. With one Project, it links that
Project. With more than one, you choose the Project in the terminal. Console records the Project Link, and the CLI
writes .vendure/project.json in the resolved Vendure project. Your role in the organization must allow you to
develop the Project.
To link a Project of a different organization, pass its Account identifier (in Vendure Console under Settings) or its name:
When the stored login belongs to another organization, the CLI signs in again for the organization you named. This
replaces the stored login, the same as vendure auth login --organization.
The CLI sends the access token only to the selected Console API, and never prints it.
If the organization has no active Project, the command stops and links nothing. Create a Project in Vendure Console
at console.vendure.io. You can create it without a plan or trial. Then run
vendure console link again.
A link attributes the telemetry of this installation to the Console Project. The CLI sends the telemetry installation ID with the link request, and Vendure Console stores it with the Project. Vendure can then see whether a linked Project has started and taken orders. Linking is your consent to this. The CLI prints:
The installation ID is the one the Vendure server uses: .vendure/.installation-id in the nearest directory above the
project that has node_modules. If that file does not exist, the CLI creates it. The server reads the file at its next
start. A server that already keeps a different ID in its database, for example a production deployment, continues to
send telemetry with that ID. Only the installation that ran vendure console link is attributed.
With VENDURE_DISABLE_TELEMETRY=true (or 1), the link sends no installation ID and the CLI creates none. A
project that was never linked sends anonymous telemetry, as before. After an unlink, telemetry is anonymous only if
Console removed the attribution. See Unlink a project.
A link with --force first tells Console to stop the attribution of the link it replaces. It does this also when
VENDURE_DISABLE_TELEMETRY is set. For this request the CLI uses only a stored login for the account of the replaced
link. It does not sign you in to that account. If the request fails, the CLI shows a warning that names the replaced
Project, its ID and the installation ID, and continues with the new link. The attribution can then stay with the
replaced Project until someone removes it in Console.
Console moves an existing attribution to the new Project only within the same Console account. If an attribution that the CLI could not stop belongs to a different account, it stays with that account until that account unlinks the installation. The CLI cannot see this case, so it still reports the new Project as attributed.
A repeated link without --force does not contact Console, so it does not attribute a project that was linked before
this feature or on another machine. Run vendure console link --force to attribute it.
A linked Project gives you Vendure development workflows and patterns through your coding assistant. After a successful link, the CLI prints these steps:
https://docs.vendure.io/mcp as an MCP server in your coding assistant.The CLI also prints a link to the setup guide at docs.vendure.io/how-to-use. For every Console other than the production Console, the link goes to the staging docs.
Linking does not configure or sign in to any coding assistant. You add the server to each assistant yourself. The
same URL also gives public documentation without sign-in. Vendure Console decides access when the assistant asks for
a development tool. Members of the Account who can develop the Project get access after one successful link. They do
not have to link the Project themselves, and they do not need a plan or trial. If you are signed in but have no
access, the assistant tells you to run vendure console link and names
console.vendure.io.
The CLI prints these steps only in human output. With --json or --non-interactive, the output does not change.
For automation, run:
--non-interactive prohibits prompts, sign-in, and automatic browser launch. An existing manifest is reused. If the
project has no manifest, the command returns incomplete with exit code 1 and an interactive repair command. It
sends no request to Console. --force still means a different Project Link, so it requires an interactive run even
with --yes. Neither flag authorizes a plugin to replace credentials or registry tokens.
--json writes one result to stdout and disables terminal prompts. Reporter progress, including the sign-in code,
goes to stderr. Sign-in remains available unless --non-interactive is set. Without a terminal, the command links
only an organization's single Project. When there are more, it fails and lists them. Human output remains the
default.
The result has this shape:
Link outcomes are linked, repaired, incomplete, or failed. Missing inputs name the required input and may
include flag, command, argument, or environment names. They never contain secret values. Plugin setup data
is stored under the plugin ID in data.plugins. Incomplete or failed setup returns exit code 1 and keeps the
linked manifest. Interrupts retain exit code 130 or 143. JSON results contain no tokens, parsed option values, or raw
errors. Plugins must supply only safe setup metadata.
Use status to validate and display the local link:
The output includes the Account, Project, Console origins, schema version, protocol version, and telemetry
attribution. The telemetry line is attributed when the current link sent this installation's ID, off when
VENDURE_DISABLE_TELEMETRY is set, and not attributed otherwise. This command reads local state only. It does not contact Vendure Console and does not sign you in. Use vendure auth status to see who is
signed in.
Use unlink to remove the local manifest:
This command removes .vendure/project.json. If the link attributed telemetry, the CLI first tells Vendure Console to
stop the attribution. For this, it uses your CLI login, and signs you in when it runs in a terminal. If Console cannot
be reached or refuses the request, the CLI shows a warning and still removes the local link and its attribution
record. Console then continues to attribute telemetry from this installation to the Project until the attribution is
removed. In that case, set VENDURE_DISABLE_TELEMETRY=true to stop telemetry from this installation.
The command does not delete the Console Project or its Project Link, and it does not revoke server-side credentials.
Your CLI login stays. Run vendure auth logout to sign out.
The CLI uses the nearest project that has a direct @vendure/core dependency. From a monorepo root, it uses the only
Vendure project under packages, apps, libs, services, or modules. If more than one project exists, select one:
Use --force to create a different Project Link for an already-linked project, or to remove its current link without
confirmation:
Before it links, vendure console link --force tells Console to stop the telemetry attribution of the link it
replaces. See Telemetry attribution.
--force also permits replacement of an invalid manifest. It does not bypass ambiguous project selection or a manifest
that belongs to another project root.
Running vendure console link in a project that is already linked repairs it rather than replacing it: the manifest
is reused and any plugin setup runs again. Where a plugin is registered, that is confirmed first, because the manifest
may have arrived with a clone.
Use --yes to answer every confirmation owned by the CLI. This includes manifest changes and plugin setup on a
repair. It does not answer questions asked by a plugin hook:
On an already-linked project, --yes keeps the repair behavior. Only --force creates a different Project Link.
The manifest contains Project Link identity metadata and Console endpoint metadata:
The Console values are origins. They contain no path, query, fragment, or credentials. The CLI also accepts a
manifest without console and treats it as a production Console link. Running vendure console link again adds
the console block.
Commit .vendure/project.json so that the repository keeps its Project identity. Ignore all other .vendure files.
They are reserved for machine-local state and may contain secrets.
vendure console link updates the resolved project's .gitignore with these rules when they are missing:
The command normally changes no .gitignore file outside the project directory. One exception applies in a
monorepo: an ancestor rule such as .vendure/ prevents Git from reading the project's .gitignore. The command
then adds rules for only the selected project to that ancestor file:
The original ancestor rule stays unchanged, and other projects remain ignored. The command reports the exact
.gitignore file that it changed.
The command uses the Console recorded in .vendure/project.json. A manifest without console and an unlinked project use
https://console.vendure.io and https://api.vendure.io. To use a local Console environment, set both variables:
An explicit pair takes precedence when no manifest exists or when it matches the manifest. If it names a different Console, the command refuses to continue and prints both pairs. Unset the variables to use the linked Console.
The prerelease variables VENDURE_CONSOLE_LINK_URL and VENDURE_CONSOLE_LINK_API_URL are not supported. Use
VENDURE_CONSOLE_APP_URL and VENDURE_CONSOLE_API_URL instead. The CLI stops with a migration message when either
old variable is set, including when its value is empty.
The prerelease --allow-custom-console option is also not supported and has no replacement. Console linking accepts
only the production pair, the staging pair, or loopback origins on localhost, 127.0.0.1, or ::1. A custom
Console host is not supported.
The CLI rejects partial endpoint configuration and URLs that contain credentials, paths, queries, or fragments. It
requires HTTPS except for localhost, 127.0.0.1, and ::1. It accepts the matching production pair, the matching
staging pair, or a loopback pair. It rejects other hosts.
The Vendure CLI automatically supports monorepo structures where packages have their own tsconfig.json files that extend a shared base configuration.
For the CLI to work correctly in a monorepo, ensure that:
tsconfig.json that extends the root configtsconfig.jsonA typical monorepo structure:
Root tsconfig.json:
Package packages/vendure-app/tsconfig.json:
When you run CLI commands, it:
tsconfig.json by walking up from your Vendure config fileextends chain to merge all configurations@my-org/shared resolve correctlyThe CLI automatically detects your monorepo structure. No additional configuration flags are required as long as your tsconfig.json files are properly set up with extends.
Packages can add new commands, add to existing ones, or replace them outright by exporting a CLI plugin.
In the plugin package:
Declare the entry point in that package's package.json:
The CLI can read the optional cliCommands list without loading the plugin.
It uses the list to give an actionable error for an unknown command, and to say
what an installed but not yet enabled package would add when you run vendure plugins. Once a plugin is enabled the CLI reads its commands from the
plugin itself, so this list only has to be right for a package that is not
enabled yet.
vendure --help lists the commands and shared options a plugin registers under
a heading naming the package, so it is clear where each one came from:
Options:
  -V, --version             output the version number
  -h, --help                display help for command

Options from @example/vendure-cli-plugin:
  --token <token>           API token

Commands:
  add [options]             Add a feature to your Vendure project
  ...

Commands from @example/vendure-cli-plugin:
  hello [options]           Say hello
The heading uses the package name exactly as it is installed, so it names the
thing to enable or remove. Nothing changes about how a command is run: vendure hello is still vendure hello.
A command extended through extendCommands rather than registered outright
stays under the heading it already had, because the command is still the one
that declared it.
A command entry that has subcommands and no action is a group. A group only
exists to hold the commands below it. Running it without a subcommand prints its
help to stderr and exits 1. Groups can be nested to any depth.
That plugin adds vendure config server set <key> <value>. Help is generated
by the CLI at every level, so vendure --help lists config,
vendure config --help lists server, and vendure config server set --help
lists the arguments and the options that are valid there. Unknown subcommands,
unknown options and missing arguments fail through the CLI's normal error path
with exit code 1.
A command may declare an action and subcommands together. Running it on its
own runs the action; naming one of its subcommands runs that instead. Use this
where a command already exists and needs commands underneath it without changing
what the bare command does.
Its options are shared with every command below it, the same as a group's, so
--env above reaches deploy plan through context.inheritedOptions. The
command itself reads --env from its own options argument.
A command that has subcommands cannot also declare arguments. The first word
after the command name would be ambiguous, since it could equally name a
subcommand or fill an argument, so declaring both is rejected when the plugin is
registered. Take an option instead.
That means a word which names no subcommand is always a mistake, and it is reported as an unknown command rather than reaching the action:
More than one plugin may need the same command. One plugin might add a
credential to vendure dev, and another might need to add to it as well.
extendCommands lets each of them contribute without discarding the others:
their options are merged onto one command and their decorators are composed.
A decorator that takes ...args in order to forward them should read the tail
with readCommandContext() and readCommandOptions() rather than indexing into
the array. Both throw a named error if handed anything else.
decorate is called once, when the plugin is registered, and is given:
next, the action of the command as composed so far. Call it to run
everything beneath your wrapper, ending in the original implementation.command, that same command's definition, so you can read the options,
arguments and description already contributed.Never import the original action to call it, for example
builtinCommands.dev.action. That binds to the built-in and skips whatever
other plugins have added, so only one of the wrappers would survive. next is
what makes several plugins able to wrap the same command.
An extension may target a nested command with a path, either
['config', 'server', 'set'] or 'config server set'. Extending a command
group is allowed for options and the description, but a group has no action to
decorate.
Extensions are applied in vendure.cli.plugins order, so the last listed
plugin is the outermost wrapper and its decorator runs first. With:
running vendure dev calls the telemetry wrapper, which calls the credentials
wrapper, which calls the built-in. Each wrapper runs once per invocation. The
telemetry plugin, being applied last, also sees the option the credentials
plugin added in its command argument; reverse the list and the roles swap.
An extension may also add to what the command declares:
options are appended, keeping every option already on the command.description replaces the one shown in help. If two plugins set it, the last
listed wins and the CLI writes a notice naming both.An extension cannot add positional arguments. Commander passes one argument slot
per declared positional, so an appended argument would shift the options, the
Command and the context that an action written before the extension expects.
replaces: true is still the way to take a command over completely, and it
discards whatever was there. A plugin cannot replace a command that another
plugin has already extended, because that would throw away their contribution.
Listing the replacing plugin first works, and later plugins then extend the
replacement.
An extension cannot add subcommands to a group. Two plugins contributing
different subcommands to one group is not supported: the second registration of
the group name is a collision, and replaces: true is refused once the group has
been extended. A group and all its subcommands must come from one plugin.
Register an afterConsoleLink hook when a plugin must run setup after
vendure console link writes or reuses the Project Link Manifest. A repair also adds the Console origins to a
manifest that does not contain them:
The context contains projectRoot, manifest, manifestPath, endpoints,
outcome, the optional session, signal, reporter, confirm,
isNonInteractive, force, outputMode, immutable parsed options, and contributeResult. Each hook gets its own manifest and endpoint
objects. A session is also copied when the hook requested one and a CLI login
exists.
Wrap a hook with requiresSession: true when it calls Vendure Console as the
user. vendure console link then makes sure a CLI login
exists before the hook runs. Read the access token with getAccessToken(),
pointed at the Console of the link:
context.session holds the same access token, without a refresh token. The
access token is user-scoped and can authorize access across the
user's Console projects. Do not store it. Call getAccessToken() each time a
token is needed, so the CLI renews it.
Do not replace the console command for post-link setup. Register the hook.
vendure.cli.plugins order. The first thrown error stops the rest.Throw when setup fails, or call context.contributeResult with outcome: 'incomplete' or 'failed', safe data,
and repair steps. Both stop later hooks and return non-zero. Use outcome: 'configured' for completed setup.
Core combines contributions into one result. Do not print a second JSON object or include credentials, tokens,
raw errors, or parsed option values in a contribution. Use context.reporter for progress.
context.outputMode is 'human' or 'json'. context.options is a frozen copy of parsed command options,
including flags declared by extendCommands. Define explicit plugin replacement flags and read them here.
Core's --yes and --force apply only to Core decisions. On a repair, a session-requesting hook gets the CLI login
for the manifest's account, or for the organization that --organization names. An interactive repair signs in
first when no such login is stored. A non-interactive repair does not sign in. If the login is missing, report
incomplete setup through contributeResult. Core does not read plugin credential stores.
Check context.isNonInteractive before calling context.confirm. The confirm
function rejects in a non-interactive run. Put multi-choice setup in a plugin
command.
In an already-linked project, vendure console link reuses the manifest and
runs hooks with context.outcome set to 'repaired'. The repair creates no
Project Link. It signs in only when a hook requested a session and no login is
stored, as described above.
An interactive repair names the project and account before it runs hooks. Pass
--yes to answer this CLI confirmation in advance. The CLI asks nothing when
no hooks are registered or when the run is non-interactive.
--force links a checkout to a different Console Project. It
skips the reuse, links the Project you choose, and the hooks run with an outcome
of 'linked'.
If a hook must run only against production, require
context.endpoints.official === 'production'. The value is 'staging' for the
official staging pair and undefined for loopback origins.
The value describes the origins for the current run. A repair gets them from the manifest unless the matching environment variables are set.
A plugin that calls a Vendure service on the user's behalf reads the login made with vendure auth login. It never
reads auth.json directly. vendure console link uses the same login. getAccessToken() returns a valid access token, renewing it first when it is about to
expire, or undefined when nobody is signed in:
Refresh tokens are single-use. The CLI serializes renewals across concurrent vendure processes with a lock file, so
renew through these functions only. A SessionRejectedError means the login has ended and the user must run
vendure auth login again. So does a ReauthenticationRequiredError, which WorkOS raises when, for example, the
organization starts to enforce SSO or MFA. Its code names the reason. A SessionRefreshUnavailableError leaves the
login in place and is usually transient, such as a network failure. Its message says when a retry will not help. A
SessionLockUnavailableError means another vendure command held the login for too long, or the config directory is
not writable. Nothing was spent, so the command can be retried.
readAuthStatus() describes the login, including the organization it is scoped to, without its tokens.
listOrganizations() returns the Vendure Console organizations the user is an active member of. To change the
organization, ask the user to run vendure auth login --organization.
defineCliPlugin ignores keys it does not know. A plugin written against a newer
CLI than the one it resolves therefore loads cleanly and then quietly decorates
nothing and runs no hook, which is harder to spot than a refusal. Read
CLI_PLUGIN_EXTENSION_POINTS to fail loudly instead:
Entries are only added, never removed or renamed, so a check written against one release keeps working.
Options that apply to more than one command are declared once, at the scope they belong to:
rootOptions on the plugin are added to vendure itself, so every command
can be given them.options on a command that has subcommands apply to every command below it,
whether that command is a group or runs an action of its own.A shared option can be given anywhere on the command line once the command that declares it has been reached. These two are equivalent — same flag, same value, different position:
A group's own options work the same way from the group onwards:
but only within that group, so vendure project list --profile ci fails with an
unknown option error.
Values reach the action through the CliCommandContext that the CLI appends
after Commander's own arguments, which means a command never has to read or
reparse process.argv:
inheritedOptions is keyed by the long flag without --, camel-cased, so
--api-token is read as apiToken. An option that was neither supplied nor
given a defaultValue is left out.
required: true on an option means a value must follow the flag, not that
the flag has to be given. --token <token> with required: true may still be
omitted entirely, and its value will be absent from inheritedOptions. Check
for it in your action. On an argument, required: true does mean the
argument is mandatory.
defaultValue, whichever
level declared it.--api-token and --apiToken collide: both are stored as apiToken.-h, --help, -V or --version, which the CLI owns.subOptions are registered on the same command as their parent, so every rule
above applies to them too. They nest one level only; anything deeper is
rejected, because the CLI would validate a flag it never registers.vendure plugins --json and a shared --json for example. The two
then refer to the same value: whatever is supplied on the command line is
visible both in the command's own options and in inheritedOptions. They must
agree on whether a value follows the flag, otherwise the plugin is rejected.A command that reads or writes a Vendure project sets requiresProject: true.
The CLI then refuses to run it outside a project, rather than letting it fail
part way through — after a stack of prompts, or on a require of a package that
only a project installs:
Running it from a directory that is not in a project writes to stderr and exits with code 1, without the action running:
Declared on a command that has subcommands, or on a group, it applies to every
command below it. A subcommand sets requiresProject: false to opt back out,
which is how a group mixes commands that need a project with ones that do not:
This matters most for a globally installed CLI (npm install -g @vendure/cli),
which can be run from any directory on the machine.
The CLI looks for a package.json with a dependency in the @vendure/ scope, in
the current directory or any parent, so the check passes from a subdirectory of a
project. It answers one question — is there a Vendure project here — and a
command whose needs are narrower still checks for itself and reports its own
error: migrate wants a config file it can resolve, add wants a tsconfig.
Outside a project, vendure --help marks these commands rather than hiding
them, so the command list is the same wherever the CLI is run. The legend is
added to the help of every command where a marker appears, and says where the
user is, which a marker on its own cannot:
Inside a project nothing is marked and no legend is added.
Set it only where running outside a project cannot produce a useful result.
The built-in doctor command, for instance, does not set it: reporting
that a directory is not a Vendure project is one of the things it checks, so
refusing to run would remove the answer in the case that most needs it.
A plugin that would take over or discard something it does not own is not registered at all, and the reason is written to stderr. This applies to:
id that a plugin already applied uses, whatever either of them
registers, because the id is what a conflict names and what a hook is
recorded against;replaces: true;decorate on a command
group;plugins command, which the CLI reserves because it is how a
plugin is disabled, or the help command, which is how a user finds their way
out of a broken one.Conflicts are collected and reported together where the CLI can carry on
checking. The rest of the CLI keeps working either way, so
vendure plugins remove <package> is always available to disable the plugin.
The CLI discovers direct dependencies that declare vendure.cliPlugin, but
does not load them until they are listed in the project package.json:
Manage that list with:
The CLI uses the discovered Core project for the plugin allowlist and package resolution. For dev,
--project <dir> selects that project before plugins are loaded. Workspace discovery applies to plugin
loading for every command, and vendure plugins add and remove use the discovered member's allowlist.
From a project subdirectory, lookup walks up to the project. If no Core project is found, lookup keeps
its existing preference for a parent package.json that configures vendure.cli or depends on
@vendure/cli. Dependencies between the working directory and that parent remain eligible.
An ambiguous workspace produces a plugin scope error and loads no member's plugins. Help and diagnostic
commands remain available. Run dev --project <dir> to select a member. For project plugin changes,
run vendure plugins add or remove from inside the member directory. Explicit --global changes
still use the global allowlist.
A package that declares a plugin but is not listed is reported by a one-line hint on stderr rather than being loaded:
vendure plugins lists each discovered package as enabled, not-enabled or
failed. failed means the package is listed in plugins but could not be
resolved or loaded — for example it is not a direct dependency, does not declare
vendure.cliPlugin, or its entry file is missing because a workspace package has
not been built. The reason is shown alongside it.
A package named in plugins must also be a direct project dependency.
Disabling a plugin is simply removing it from the list (vendure plugins remove).
Commands are registered in allowlist order, so when two plugins both declare
replaces: true for the same command, the last listed one wins. Extensions are
applied in the same order, and all of them are kept.
A listed plugin that cannot be resolved, loaded or registered is skipped with an
error on stderr — the rest of the CLI (including vendure plugins remove) stays
usable. That covers a decorator which throws while it is being applied: the
plugin contributes nothing and every other plugin is unaffected.
The CLI can also be installed globally, so that its commands are available from any directory:
A globally installed plugin is enabled in the machine-wide list rather than in a project, because there is no project to write to:
That list lives in cli.json, in the CLI's config directory —
$XDG_CONFIG_HOME/vendure or ~/.config/vendure on Linux and macOS, %APPDATA%\vendure
on Windows, or wherever VENDURE_CLI_CONFIG_DIR points:
pluginRoots lists extra directories to resolve those packages from. It is
normally empty: the CLI looks in its own installation directory, where a
globally installed plugin sits beside it. Use it when a package manager
arranges global packages somewhere the CLI does not find them.
Both lists apply at once. Global plugins are registered first and project plugins second, so a project overrides the machine — the same rule that makes the last entry of a single list win. A package enabled in both is loaded once, from the project, so the copy pinned alongside the project's code is the one that runs.
vendure plugins shows which list each package came from:
With no --global flag, add and remove write to the project when there is
one and to the machine-wide list when there is not, so the command does the
expected thing in both places.
VENDURE_CLI_PLUGINS is a comma-separated list of packages to enable, added to
whatever cli.json lists:
The variable is read afresh at every invocation and is additive to cli.json,
so it enables a plugin without writing anything to disk, and
vendure plugins remove --global cannot countermand it — unset the variable
instead.
Installed globally, @vendure/cli and a plugin are independent installs and
nothing pins them to each other, so a plugin can meet an older CLI than it was
written against. Check for the capabilities you rely on — see
Checking what the installed CLI supports.
Built-in commands that read a project — migrate, schema, doctor — load
@vendure/core from the project rather than from the CLI's own installation, so
a global CLI runs each project against that project's own version of Vendure.
To see all available commands and options:
Architecture reviews, custom plugin work, migrations, ongoing support. Get a hand from the team that builds Vendure.
Talk to the team--api-extension [plugin] |
| Add API extension scaffold |
vendure add -a MyPlugin --queryName getName --mutationName setName |
-d | --dashboard [plugin] | Add Dashboard extensions setup | vendure add -d MyPlugin |
--config <path> | Specify custom Vendure config file | --config ./custom-config.ts |